Monday, February 29, 2016

Mengganti Tema di Sublime Text 3


Sublime Text 3 merupakan menu editor yang powerfull dan terkenal dikalangan para programmer, keunggulan sublime selain ringan juga dapat membantu pekerjaan para programmer dengan packages-packages yang dapat diinstall misalnya Sublimelinter, Emmet, dsb.

Pada kesempatan kali ini saya tidak membahas bagaimana menginstall sublimelinter, emmet maupun packages yang ada. Disini saya akan membahas cara mengganti tema default sublime text 3 dengan Material Theme.
Berikut tampilan dari material theme.


Cukup cantik bukan ? Oke mari kita ganti..

Pertama-tama pastikan sobat sudah menginstall package control, kalau belum silahkan kesini packagecontrol.io, pilih tab sublime text 3 lalu copy kode yang ada dan kembali ke sublime,  silahkan tekan tombol ctrl + ` lalu copy kode yang tadi dan tekan enter. Tunggu proses nya sampai selesai.

Setelah packages control terinstall, tekan secara bersamaan ctrl + shift + p dan cari atau ketik install package. Setelah keluar menu nya yang di maksud, ketik lagi Material Theme, pilih lalu enter dan tunggu sampai proses download hingga selesai, bila berhasil silahkan di restart sublime sobat.

Demikian cara mengganti tema sublime dengan material theme, bila ada pertanyaan atau hal yang tidak dimengerti pada langkah-langkah diatas silahkan tinggalkan pesan dikolom komentar dan apabila ada kesalahan dalam penulisan mohon perbaikannya. Sekian dan semoga bermanfaat.

Sumber : https://github.com/equinusocio/material-theme

Sunday, February 28, 2016

Styling Fixed Navbar Drop down Menu Blogger (Complete Tutorial)


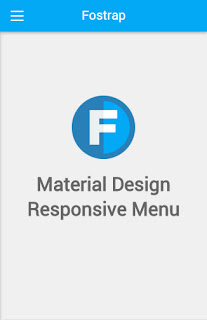
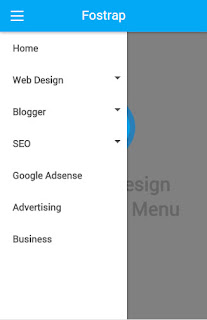
Tired of the existing navbar designs in your blog? This time the fostrap will give tutorials Styling material design responsive menu to enhance your navbar you present! okay just go ahead

Screenshoot

on desktop
drop down menu blogger

on mobile

drop down menu for blogger

drop down menu for blogger

Let's Make Fixed Navigation Menu For Blogger

Step 1

Copy The CSS

body {
padding-top: 50px;
}
* {
  margin: 0;
  padding: 0;
  -webkit-box-sizing: border-box;
  -moz-box-sizing: border-box;
  -ms-box-sizing: border-box;
  box-sizing: border-box;
}
navbar a { text-decoration: none !important; }
.nav-fostrap {
  display: block;
  margin-bottom: 15px 0;
  background: #3498db;
  -webkit-box-shadow: 0 2px 5px 0 rgba(0, 0, 0, 0.26);
  -moz-box-shadow: 0 2px 5px 0 rgba(0, 0, 0, 0.26);
  -ms-box-shadow: 0 2px 5px 0 rgba(0, 0, 0, 0.26);
  -o-box-shadow: 0 2px 5px 0 rgba(0, 0, 0, 0.26);
  box-shadow: 0 2px 5px 0 rgba(0, 0, 0, 0.26);
  z-index: 120;
}
.nav-fostrap ul {
  list-style-type: none;
  margin: 0;
  padding: 0;
  display: block;
}
.nav-fostrap li {
  list-style-type: none;
  margin: 0;
  padding: 0;
  display: inline-block;
  position: relative;
  font-size: 14px;
  color: #def1f0;
}
.nav-fostrap li a {
  padding: 15px 20px;
  font-size: 14px;
  color: #def1f0;
  display: inline-block;
  outline: 0;
  font-weight: 400;
}
.nav-fostrap li:hover ul.dropdown { display: block; }
.nav-fostrap li ul.dropdown {
  position: absolute;
  display: none;
  width: 200px;
  background: #2980b9;
  -webkit-box-shadow: 0 2px 5px 0 rgba(0, 0, 0, 0.26);
  -moz-box-shadow: 0 2px 5px 0 rgba(0, 0, 0, 0.26);
  -ms-box-shadow: 0 2px 5px 0 rgba(0, 0, 0, 0.26);
  -o-box-shadow: 0 2px 5px 0 rgba(0, 0, 0, 0.26);
  box-shadow: 0 2px 5px 0 rgba(0, 0, 0, 0.26);
  padding-top: 0;
  z-index: 110;
}
.nav-fostrap li ul.dropdown li {
  display: block;
  list-style-type: none;
}
.nav-fostrap li ul.dropdown li a {
  padding: 15px 20px;
  font-size: 15px;
  color: #fff;
  display: block;
  font-weight: 400;
}
.nav-fostrap li ul.dropdown li:last-child a { border-bottom: none; }
.nav-fostrap li:hover a {
  background: #2980b9;
  color: #fff !important;
}
.nav-fostrap li:first-child:hover a { border-radius: 3px 0 0 3px; }
.nav-fostrap li ul.dropdown li:hover a { background: rgba(0,0,0, .1); }
.nav-fostrap li ul.dropdown li:first-child:hover a { border-radius: 0; }
.nav-fostrap li:hover .arrow-down { border-top: 5px solid #fff; }
.arrow-down {
  width: 0;
  height: 0;
  border-left: 5px solid transparent;
  border-right: 5px solid transparent;
  border-top: 5px solid #def1f0;
  position: relative;
  top: 15px;
  right: -5px;
  content: '';
}
.title-on-mobile {
  display: none;
}
 @media only screen and (max-width:900px) {
.nav-fostrap {
  background: #fff;
  width: 200px;
  height: 100%;
  display: block;
  position: fixed;
  left: -200px;
  top: 0px;
  -webkit-transition: left 0.25s ease;
  -moz-transition: left 0.25s ease;
  -ms-transition: left 0.25s ease;
  -o-transition: left 0.25s ease;
  transition: left 0.25s ease;
  margin: 0;
  border: 0;
  border-radius: 0;
  overflow-y: auto;
  overflow-x: hidden;
  height: 100%;
  z-index: 105;
}
.title-on-mobile {
  position: fixed;
  display: block;
    top: 10px;
    font-size: 20px;
    left: 100px;
    right: 100px;
    text-align: center;
    color: #FFF !important;
}
.nav-fostrap.visible {
  left: 0px;
  -webkit-transition: left 0.25s ease;
  -moz-transition: left 0.25s ease;
  -ms-transition: left 0.25s ease;
  -o-transition: left 0.25s ease;
  transition: left 0.25s ease;
  z-index: 90;
}
.nav-bg-fostrap {
  display: inline-block;
  vertical-align: middle;
  width: 100%;
  height: 50px;
  margin: 0;
  position: absolute;
  top: 0px;
  left: 0px;
  background: #3498db;
  padding: 12px 0 0 10px;
  -webkit-box-shadow: 0 2px 5px 0 rgba(0, 0, 0, 0.26);
  -moz-box-shadow: 0 2px 5px 0 rgba(0, 0, 0, 0.26);
  -ms-box-shadow: 0 2px 5px 0 rgba(0, 0, 0, 0.26);
  -o-box-shadow: 0 2px 5px 0 rgba(0, 0, 0, 0.26);
  box-shadow: 0 2px 5px 0 rgba(0, 0, 0, 0.26);
  z-index: 100;
}
.navbar-fostrap {
  display: inline-block;
  vertical-align: middle;
  height: 50px;
  cursor: pointer;
  margin: 0;
    position: absolute;
    top: 0;
    left: 0;
    padding: 12px;
    z-index: 102;
}
.navbar-fostrap span {
  height: 2px;
  background: #fff;
  margin: 5px;
  display: block;
  width: 20px;
}
.navbar-fostrap span:nth-child(2) { width: 20px; }
.navbar-fostrap span:nth-child(3) { width: 20px; }
.nav-fostrap ul { padding-top: 50px; }
.nav-fostrap li { display: block; }
.nav-fostrap li a {
  display: block;
  color: #505050;
  font-weight: 600;
}
.nav-fostrap li:first-child:hover a { border-radius: 0; }
.nav-fostrap li ul.dropdown { position: relative; }
.nav-fostrap li ul.dropdown li a {
  background: #2980b9 !important;
  border-bottom: none;
  color: #fff !important;
}
.nav-fostrap li:hover a {
  background: #3498db;
  color: #fff !important;
}
.nav-fostrap li ul.dropdown li:hover a {
  background: rgba(0,0,0,.1); !important;
  color: #fff !important;
}
.nav-fostrap li ul.dropdown li a { padding: 10px 10px 10px 30px; }
.nav-fostrap li:hover .arrow-down { border-top: 5px solid #fff; }
.arrow-down {
  border-top: 5px solid #505050;
  position: absolute;
  top: 20px;
  right: 10px;
}
.cover-bg {
  background: rgba(0,0,0,0.5);
  position: fixed;
  top: 0;
  bottom: 0;
  left: 0;
  right: 0;
}
}
 @media only screen and (max-width:1199px) {
.container { width: 96%; }
}
.fixed-top {
  position: fixed;
  top: 0;
  right: 0;
left:0;
z-index:120;
}

Step 2

Copy The HTML
copy below <body

    <navbar class="fixed-top">
      <div class='nav-fostrap'>
        <ul>
          <li><a href=''>Home</a></li>
          <li><a href='javascript:void(0)'>Web Design<span class='arrow-down'></span></a>
            <ul class='dropdown'>
              <li><a href=''>HTML</a></li>
              <li><a href=''>CSS</a></li>
              <li><a href=''>Javascript</a></li>
              <li><a href=''>JQuery</a></li>
            </ul>
          </li>
          <li><a href='javascript:void(0)' >Blogger<span class='arrow-down'></span></a>
            <ul class='dropdown'>
              <li><a href=''>Widget</a></li>
              <li><a href=''>Tips</a></li>
            </ul>
          </li>
          <li><a href='javascript:void(0)' >SEO<span class='arrow-down'></span></a>
            <ul class='dropdown'>
              <li><a href=''>Tools</a></li>
              <li><a href=''>Backlink</a></li>
            </ul>
          </li>
          <li><a href=''>Google Adsense</a></li>
          <li><a href=''>Advertising</a></li>
          <li><a href=''>Business</a></li>
        </ul>
      </div>
      <div class='nav-bg-fostrap'>
        <div class='navbar-fostrap'> <span></span> <span></span> <span></span> </div>
        <a href='' class='title-on-mobile'>Fostrap</a>
      </div>
    </navbar>
<script src='https://ajax.googleapis.com/ajax/libs/jquery/2.2.0/jquery.min.js'></script>
<script>
$(document).ready(function(){
$('.navbar-fostrap').click(function(){
$('.nav-fostrap').toggleClass('visible');
$('body').toggleClass('cover-bg');
});
});
</script> 

Just it !

How do I change navigation menu ?

Final Step

Change your menu in this script
and just delete unused menu
        <ul>
          <li><a href=''>Home</a></li>
          <li><a href='javascript:void(0)'>Web Design<span class='arrow-down'></span></a>
            <ul class='dropdown'>
              <li><a href=''>HTML</a></li>
              <li><a href=''>CSS</a></li>
              <li><a href=''>Javascript</a></li>
              <li><a href=''>JQuery</a></li>
            </ul>
          </li>
          <li><a href='javascript:void(0)' >Blogger<span class='arrow-down'></span></a>
            <ul class='dropdown'>
              <li><a href=''>Widget</a></li>
              <li><a href=''>Tips</a></li>
            </ul>
          </li>
          <li><a href='javascript:void(0)' >SEO<span class='arrow-down'></span></a>
            <ul class='dropdown'>
              <li><a href=''>Tools</a></li>
              <li><a href=''>Backlink</a></li>
            </ul>
          </li>
          <li><a href=''>Google Adsense</a></li>
          <li><a href=''>Advertising</a></li>
          <li><a href=''>Business</a></li>
        </ul>


Wednesday, February 24, 2016

Pengertian CSS Selector


CSS atau Cascading Style Sheets "merupakan sebuah mekanisme sederhana yang digunakan untuk menambahkan style / corak seperti font, warna, jarak/spasi kedalam document website".
Sumber : https://www.w3.org/Style/CSS/
Seperti kutipan diatas, inti dari fungsi css yaitu untuk mempermak dokumen HTML agar jadi sedemikian rupa atau istilah sekarangnya supaya tidak kelihatan jadul :). Untuk memilah atau menyeleksi tag HTML disebut selector, terdapat beberapa pattern / teknik yang digunakan dalam selector css, nah disini saya lampirkan beberapa teknik yang ada untuk menyeleksi tag html. Oke langsung saja ke tkp..

1. UNIVERSAL SELECTOR
Yang pertama yaitu universal selector, yaitu cara menyeleksi document tag html secara menyeluruh dari parent induk yang ditentukan dengan tanda bintang *.

Contoh :

div *{
  color : #555;
}

Cara membaca dari syntax css contoh diatas yaitu "mencari semua element atau tag div dalam document html dan mengisikan nya dengan property color dengan value #555". Universal selector juga sering digunakan untuk mereset style bawaan dari browser atau yang dikenal CSS Reset, yang dimana setiap masing-masing browser mempunyai style bawaan nya sendiri yang umumnya menambah margin dan padding sebesar beberapa pixel tertentu, dengan CSS Reset ini kita dapat merubah style default / bawaan dari tiap browser.

2. TYPE / ELEMENT SELECTOR
Type / element selector digunakan untuk memberi style pada dokumen html berdasarkan tag / element tertentu misalnya h1, p, em, strong.

Contoh :

h1{
  color : #5f5f5f;
  font-style: italic;
}

Tidak jauh berbeda dengan yang sebelumnya, cara yang kedua ini lebih sering digunakan dengan menunjuk langsung tag html nya.

3. CLASS SELECTOR
 Menyeleksi element tag dalam html dengan menggunakan tanda titik.

Contoh :

CSS
.Menu ul li{
  display : inline;
  color : #1abc9c;
  margin: 10px;
}

HTML
  <div class="Menu">
    <ul>
      <li>Beranda</li>
      <li>Profil</li>
      <li>Kontak</li>
      <li>Tentang</li>
    </ul>
  </div>

3. ID SELECTOR
Sama dengan sebelum nya hanya saja id selector mencari element tag html dalam sebuah grup yang ditandai dengan hastag # dalam css dan penamaan nya dengan id dalam html document.

Contoh :

CSS
#Menu ul li{
  display : inline;
  color : #1abc9c;
  margin: 10px;
}

HTML
  <div id="Menu">
    <ul>
      <li>Beranda</li>
      <li>Profil</li>
      <li>Kontak</li>
      <li>Tentang</li>
    </ul>
  </div>

4. CHILD SELECTOR
 Child selector yaitu menyeleksi tag html dari turunan langsung parent nya.

Contoh :

CSS
ul.anak > ul li{
  color: red;
  font-style: italic;
}

HTML
   <ul class="anak">
      <li>Kopi</li>
      <ul>
        <li>Dingin</li>
        <li>Panas</li>
       </ul>
      <li>Teh</li>
      <li>Susu</li>
   </ul>

Pada Syntax CSS cara membacanya yaitu "menyeleksi seluruh tag ul  li dari class anak pada tag ul". Contoh diatas akan menghasilkan warna merah dan cetak miring dari list item kopi langsung kepada anak nya yaitu list item panas dan dingin.

5. ATTRIBUTE SELECTOR
Selector yang berikut ini tingkatan nya cukup advance tapi bukan tidak sering dipakai. Selector ini sering digunakan menyeleksi button maupun input form .

Contoh :

CSS
input[type=text]{
  background-color: #ccc;
}

HTML
 <input type="text" name="name">

Pada Syntax CSS cara membacanya attribute selector diatas yaitu "menyeleksi type text pada inputan".

Demikian mengenai jenis-jenis selector dalam CSS, untuk jenis-jenis selector masih sangat banyak, dan beberapa contoh yang saya jelaskan diatas merupakan yang sering dipakai, untuk referensi lengkap bisa lihat di www.w3schools.com atau www.w3.org.  Bila ada hal yang ingin ditanyakan silahkan tinggalkan pesan dikolom komentar dan apabila ada kesalahan dalam penulisan mohon perbaikannya. Sekian dan semoga bermanfaat.

Awesome Search Box For Blogger

Search Box For Blogspot

The search box is one of the natural elements of a website is important enough, has almost the same functions such as search engines, i.e. to search for keywords or specific content on our website.

Add Your Own Widget Search For Blogger

1. Basic Style

search box for blogger
<style>
.is-vishidden {
  position: absolute;
  overflow: hidden;
  width: 1px;
  height: 1px;
  padding: 0;
  border: 0;
  clip: rect(1px, 1px, 1px, 1px);
}
.pattern {
  padding: 1em;
  line-height: 1;
}
.f {
   position: relative;
}
input {
  display: block;
  border: 1px solid #000;
}
input[type=search] {
    width: 100%;
    padding: 1em;
    padding-right: 7em;
    position: relative;
   top: 0;
}
#button-submit {
  position: absolute;
  right: 0.75em;
  top: 0.5em;
  bottom: 0.5em;
  z-index: 1;
  width: 6em;
  padding: 0;
  cursor: pointer;
}
</style>
<div id="pattern" class="pattern">
  <form id="searchbox" method="get" action="/search" autocomplete="off" class="f">
      <label class="is-vishidden">Search the site</label>  
    <input type="search"  name="q" placeholder="Enter your keywords..."/>
      <input id="button-submit" type="submit" class="btn search-submit" value="Search" />
</form>
</div>

2. Style With Icon

custom search bar blogger

<style>
@import url(http://netdna.bootstrapcdn.com/font-awesome/3.2.1/css/font-awesome.css);
.search {
  width: 100%;
  position: relative;
}
.search:before {
  position: absolute;
  top: 0;
  right: 0;
  width: 40px;
  height: 40px;
  line-height: 40px;
  font-family: 'FontAwesome';
  content: '\f002';
  background: #34495e;
  text-align: center;
  color: #fff;
  border-radius: 5px;
  -webkit-font-smoothing: subpixel-antialiased;
  font-smooth: always;
}
.searchTerm {
  -moz-box-sizing: border-box;
  -webkit-box-sizing: border-box;
  box-sizing: border-box;
  width: 100%;
  border: 5px solid #34495e;
  padding: 5px;
  height: 40px;
  border-radius: 5px;
  outline: none;
}
.searchButton {
  position: absolute;
  top: 0;
  right: 0;
  width: 40px;
  height: 40px;
  opacity: 0;
  cursor: pointer;
}
</style>
<form id="searchbox" method="get" action="/search" autocomplete="off" class="search">
  <input class="searchTerm" type="search"  name="q"   placeholder="Enter your search term ..." /><input class="searchButton" id="button-submit" type="submit" />
</form>

3. Corner shape style

blogspot search
<style>
.cf:before, .cf:after{
    content:"";
    display:table;
}

.cf:after{
    clear:both;
}

.cf{
    zoom:1;
}  
 /* Form wrapper styling */
.search-wrapper {
width: 252px;
margin: 15px auto;
box-shadow: 0 1px 1px rgba(0, 0, 0, .4) inset, 0 1px 0 rgba(255, 255, 255, .2);
}

/* Form text input */

.search-wrapper input {
width: 150px;
height: 20px;
padding: 10px 15px;
float: left;
font: bold 15px 'lucida sans', 'trebuchet MS', 'Tahoma';
border: 0;
background: #EEE;
border-radius: 3px 0 0 3px;
}

.search-wrapper input:focus {
    outline: 0;
    background: #fff;
    box-shadow: 0 0 2px rgba(0,0,0,.8) inset;
}

.search-wrapper input::-webkit-input-placeholder {
   color: #999;
   font-weight: normal;
   font-style: italic;
}

.search-wrapper input:-moz-placeholder {
    color: #999;
    font-weight: normal;
    font-style: italic;
}

.search-wrapper input:-ms-input-placeholder {
    color: #999;
    font-weight: normal;
    font-style: italic;
}  

/* Form submit button */
.search-wrapper button {
overflow: visible;
position: relative;
float: right;
border: 0;
padding: 0;
cursor: pointer;
height: 40px;
width: 72px;
font: bold 15px/40px 'lucida sans', 'trebuchet MS', 'Tahoma';
color: white;
text-transform: uppercase;
background: #D83C3C;
border-radius: 0 3px 3px 0;
text-shadow: 0 -1px 0 rgba(0, 0, 0, .3);
}
 
.search-wrapper button:hover{  
    background: #e54040;
}
 
.search-wrapper button:active,
.search-wrapper button:focus{
    background: #c42f2f;
    outline: 0;
}

.search-wrapper button:before { /* left arrow */
    content: '';
    position: absolute;
    border-width: 8px 8px 8px 0;
    border-style: solid solid solid none;
    border-color: transparent #d83c3c transparent;
    top: 12px;
    left: -6px;
}

.search-wrapper button:hover:before{
    border-right-color: #e54040;
}

.search-wrapper button:focus:before,
.search-wrapper button:active:before{
        border-right-color: #c42f2f;
}    

.search-wrapper button::-moz-focus-inner { /* remove extra button spacing for Mozilla Firefox */
    border: 0;
    padding: 0;
}  
</style>
<form id="searchbox" method="get" action="/search" autocomplete="off" class="search-wrapper cf">
        <input type="text" name="q" placeholder="Search here..." required="" />
        <button type="submit" id="button-submit" >Search</button>
    </form>

4. Simple search

blogspot search
<style>
@import url(http://weloveiconfonts.com/api/?family=fontawesome);
/* fontawesome */
[class*="fontawesome-"]:before {
  font-family: 'FontAwesome', sans-serif;
}
body{
  text-align:center;

  background-color:#ebebeb;
}
.cf:before, .cf:after{
    content:"";
    display:table;
}

.cf:after{
    clear:both;
}

.cf{
    zoom:1;
}  
 /* Form wrapper styling */
.search-wrapper {
width: 240px;
margin: 45px auto 50px auto;
  border: 1px solid #ccc;
border-radius: 5px;
 
}

/* Form text input */

.search-wrapper input {
width: 160px;
height: 20px;
padding: 10px 15px;
float: left;
font: normal 16px 'Arial', 'Tahoma';
border:0;
background: #fff;
border-radius: 5px 0 0 5px;
}
.search-wrapper input:hover + .search-wrapper button {
    background: #ccc
}

.search-wrapper input:focus {
    outline: 0;
    background: #FFF;
}

.search-wrapper input::-webkit-input-placeholder {
   color: #c6c7c6;
   font-weight: normal;
}

.search-wrapper input:-moz-placeholder {
    color: #999;
    font-weight: normal;
    font-style: italic;
}

.search-wrapper input:-ms-input-placeholder {
    color: #999;
    font-weight: normal;
    font-style: italic;
}  

/* Form submit button */
.search-wrapper button {
overflow: visible;
position: relative;
float: right;
border:0;
padding: 0;
cursor: pointer;
height: 40px;
width: 50px;
font: bold 18px 'Arial', 'Tahoma';
color: white;
background: #3498db;
border-radius: 0 5px 5px 0;
transition: all 2.0s linear;
    -webkit-transition: all 0.2s linear;
    -moz-transition: all 0.2s linear;
    -ms-transition: all 0.2s linear;
    -o-transition: all 0.2s linear;
}
 
.search-wrapper button:hover{  
    background: #2980b9;
    transition: all 2.0s linear;
    -webkit-transition: all 0.2s linear;
    -moz-transition: all 0.2s linear;
    -ms-transition: all 0.2s linear;
    -o-transition: all 0.2s linear;
}
 
.search-wrapper button:active,
.search-wrapper button:focus{
    background: #329400;
    outline: 0;
    transition: all 0s linear;
    -webkit-transition: all 0s linear;
    -moz-transition: all 0s linear;
    -ms-transition: all 0s linear;
    -o-transition: all 0s linear;

}


.search-wrapper button:hover:before{
    border-right-color: #e54040;

}

.search-wrapper button:focus:before,
.search-wrapper button:active:before{
        border-right-color: #c42f2f;
}    

.search-wrapper button::-moz-focus-inner { /* remove extra button spacing for Mozilla Firefox */
    border: 0;
    padding: 0;
}  
</style>
<form id="searchbox" method="get" action="/search" autocomplete="off"  class="search-wrapper cf">
        <input name="q" type="text" placeholder="Search" required="" />
        <button type="submit" id="button-submit"> <span class="fontawesome-search"></span>
        </button>
    </form>

Let's Create Blogger Search Box Widget For Blogger

First, we need set up for adding widget blogger, see the sidebar on left. 
see picture below

sidebar blog recent posts
Then, we need set up again in main bar
see picture below

add gadget for recent post

Lastly, the new window tab will appear
see picture below

simple recent post widget

Copy the above script, lets see picture below

paste script recent post thumbnail blogger

Tuesday, February 23, 2016

Flat UI Bootstrap Navbar Color #2

Flat UI Bootstrap Navbar Color


How do I use it?
just copy The HTML and replace with CSS script you want
See part 1 Flat UI Bootstrap Navbar #1

The HTML :


1. Sun Flower Bootstrap Navigation Menu

Sun Flower Bootstrap Navigation Menu

The CSS :


2. Carrot Bootstrap Navigation Menu

Carrot Bootstrap Navigation Menu

The CSS :


3. Alizarin Bootstrap Navigation Menu

Carrot Bootstrap Navigation Menu

The CSS :


4. Clouds Bootstrap Navigation Menu

Clouds Bootstrap Navigation Menu

The CSS :


5. Concrete Bootstrap Navigation Menu

Concrete Bootstrap Navigation Menu

The CSS :

Monday, February 22, 2016

Flat UI Bootstrap Navbar Color

Bootstrap Navbar Color

How do I use it?
just copy The HTML and replace with CSS script you want
See part 2 Flat UI Bootstrap Navbar Color #2

The HTML :


1. Turquoise Bootstrap Navigation Menu

Turquoise Bootstrap Navigation Menu

The CSS :


2. Emerald Bootstrap Navigation Menu

Emerald Bootstrap Navigation Menu

The CSS :


3. Peter River Bootstrap Navigation Menu


Peter River Bootstrap Navigation Menu

The CSS :


4. Amethyst Bootstrap Navigation Menu

Amethyst Bootstrap Navigation Menu

The CSS :


5. Wet Asphalt Bootstrap Navigation Menu

Wet Asphalt Bootstrap Navigation Menu

The CSS :


Sunday, February 21, 2016

Awesome Stylish Popular Post Widget For Blogger

Popular Post, or often are written by bloggers as The Most Popular Writing and basically have many functions. In addition to useful to raise traffic on our blog, pageview by installing this widget will look beautifying, too. Using the Popular Post widget in both unique and will certainly attract the attention of visitors to click and add to time his visit to our blog and the user will be more comfortable.

This time, fostrap will give you the popular post widgets with cool style

Popular Post Blogger Widget Style Numbered

Popular Post Blogger Widget Style Numbered


Go to Template > Edit HTML > And search ]]></b:skin>
Then, Copy this script above ]]></b:skin>

Popular Post Blogger Widget Style Attractive

popular post widget for blogger

Go to Template > Edit HTML > And search ]]></b:skin>
Then, Copy this script above ]]></b:skin>

Saturday, February 20, 2016

How To Create Google Translate Blogger Widgets

Create a widget on a website translator is easier if the tool becomes available. As provided free by google translate, including most translators of 50 more a familiar country. There are several translator also feature the same as gtrans, i.e. is from BING. But this time I will share how to make widget translator from google translate. You have to remember, in terms of translating a page, google indeed not forever true.
google translate widget

Let's Create Translate Google Widget For Blogger

First, we need set up for adding widget blogger, see the sidebar on left. 
see picture below

sidebar blog recent posts
Then, we need set up again in main bar
see picture below

add gadget for recent post

Then, the new window tab will appear
see picture below

popular posts widget blogger

google translate blogger widgets

Lastly, we need configure
see picture below


very easy right?

How To Create Popular Post Widget For Blogger

Popular Post, or often are written by bloggers as The Most Popular Writing and basically have many functions. In addition to useful to raise traffic on our blog, pageview by installing this widget will look beautifying, too. Using the Popular Post widget in both unique and will certainly attract the attention of visitors to click and add to time his visit to our blog and the user will be more comfortable

popular post widget for blogger

Let's Create Popular Widget For Blogger

First, we need set up for adding widget blogger, see the sidebar on left. 
see picture below

sidebar blog recent posts
Then, we need set up again in main bar
see picture below

add gadget for recent post

Then, the new window tab will appear
see picture below

popular posts widget blogger

popular posts widget blogger

Lastly, we need configure
see picture below

configure popular post

very easy right?

Thursday, February 18, 2016

How To Easily Creating Recent Post Widget For Bloggers

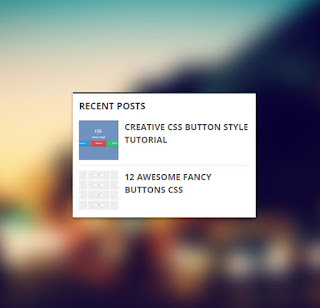
Recent Post is a widget on blogger that shows a collection of articles that are published or just wrote the last published. The existence of this widget, then some new articles we publish will be collected in a list in a widget in the sidebar of Your bloggers. The installation of this widget on your blog will be very beneficial and could increase the number of visits on your blog page. Otherwise it will make your blog become more colorful and seem more attracted the attention of visitors to click through and read the content of the posts provided. This time, Fostrap will share How To Easily Creating Recent Post Widget For Bloggers. An example is a distributed like the example in the image below.

Recent Post Widget For Bloggers

Let's Create Recent Post Widget For Blogger

First, we need set up for adding widget blogger, see the sidebar on left. 
see picture below

sidebar blog recent posts
Then, we need set up again in main bar
see picture below

add gadget for recent post

Lastly, the new window tab will appear
see picture below

simple recent post widget

Recent Post Blogger With Thumbnails Image

recent post thumbnail widget blogger

Then, copy this script below

<link href="https://googledrive.com/host/0Bwg9nKxkueEjdFBpNXNNTG1CRzA/" type="text/css" rel="stylesheet" />
<script src="https://googledrive.com/host/0Bwg9nKxkueEjUjlXaHozTTJFYnc/"></script>
 <script type='text/javascript'>
var numposts = 3;
var showpostthumbnails = true;
var displaymore = false;
var displayseparator = true;
var showcommentnum = false;
var showpostdate = false;
var showpostsummary = false;
var numchars = 100;</script>
  <script type="text/javascript" src="http://YOUR URL.com/feeds/posts/default?orderby=published&alt=json-in-script&callback=labelthumbs"></script>

Copy script dont forget to change text YOUR URL, lets see picture below

paste script recent post thumbnail blogger

Note :
  • If you want to change the number of recent post widget, just change var numpost =
  • If you want to change no thumbnails just change var showpostthumbnails = true into var showpostthumbnails = false
  • If you want to add Recent Post Widget with Summary just change var showpostsummary = false into var showpostsummary = false
Congratulations! Your blog now already installed Recent Post widget, Good Luck and Happy Blogging